Background
In a warehousing world, labels are a big thing. I can’t imagine a warehouse working without some sort of label. Therefore IT consultants/developers have to build, design & test labels every once in a while. To make the label testing easier (and reduce paper waste), I set up a neat “virtual test printer” for Zebra labels.
The requirement
I want to see (not necessarily in paper form) Zebra labels when the SAP system spits them out. I don’t have a printer (at all – I hate printers – different story) and I’m not going to get one either.
A bit of landscape
I have:
- A SAP system which is fully under my control
- A tiny Linux box (OpenSUSE 42) that is fully under my control and somewhere in our server farm
Setup
Most of this setup is based on these guides/resources
- https://km.zebra.com/kb/index?page=content&id=SO7680
- http://scn.sap.com/docs/DOC-55668
- https://www.zebra.com/us/en/products/software/barcode-printers/zebralink/sap-integration.html (for SAP downloads)
- http://zebratechcups.sourceforge.net/ (for CUPS drivers – not really needed)
- http://labelary.com/ (for actual “display”)
The Linux side of things
On the Linux side, it’s a matter of setting up CUPS and xinetd and apache (not neccessary but cool :)).
For the purpose of this documentation, I will assume the DNS entry for the linux box is just “linuxbox”
Getting CUPS ready
This requires cups to run and (in my case) be available as a remote service. The most obvious step is starting the daemon, but also a
cupsctl --remote-admin
to enable web access.
If you want to print test pages and other beautiful pictures, you must ensure that the *.ppd drivers from zebratechcups are copied in some sort of subfolder in /usr/share/cups/model (if your distribution doesn’t already provide them – OpenSUSE didn’t). However, this is not necessary if you use the setup with the SAP Zebra drivers.
After a systemctrl restart cups.service, https://linuxbox:631/admin should be accessible (use root/root password for access – can be configured differently, but I’m not fuzzed). The next steps are best screenshot-ed:
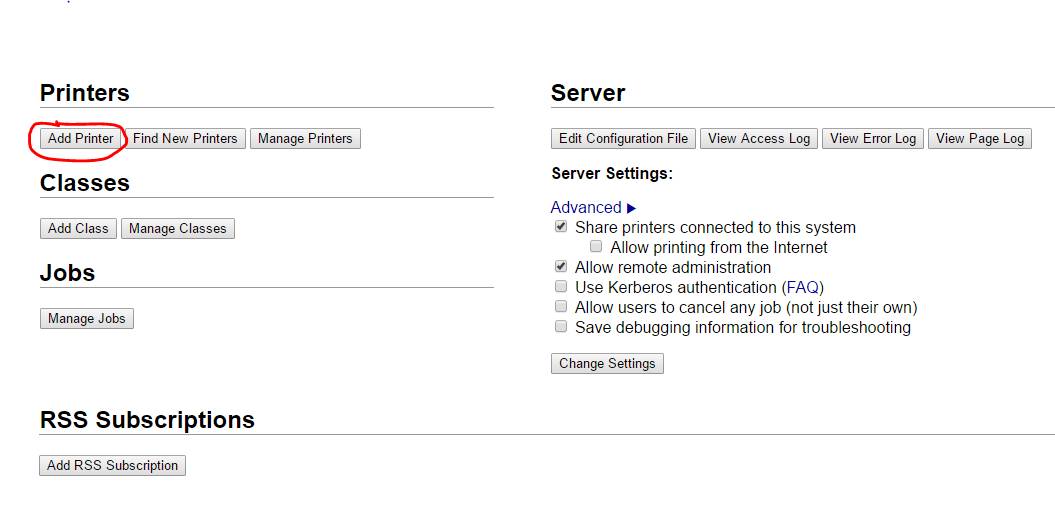
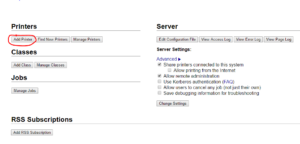 Add a new printer
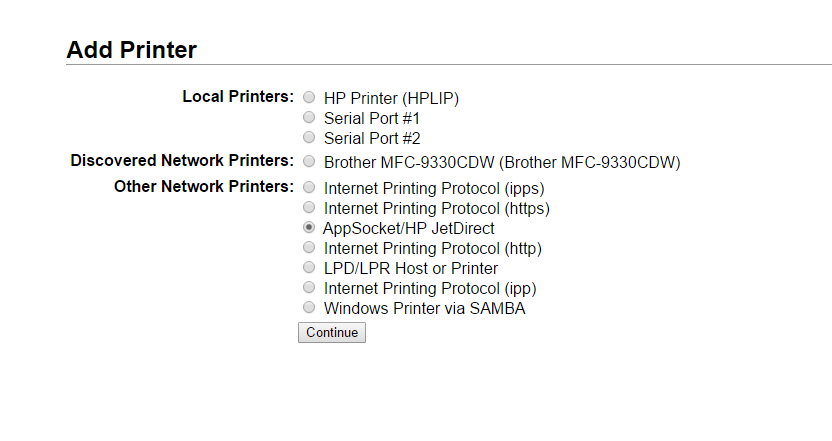
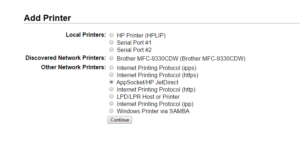 Select AppSocket/HP JetDirect
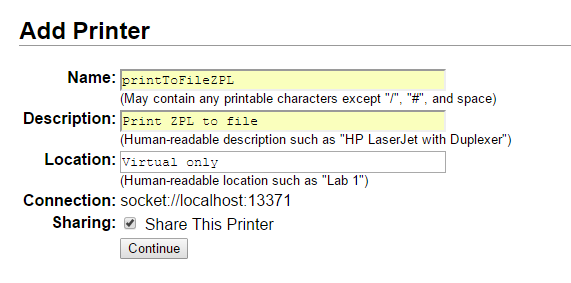
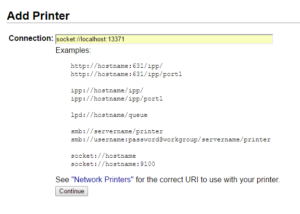 Use a socket://localhost connection string. Pick any unused port (we’ll use 13371 for this example). The corresponding service will be build later.
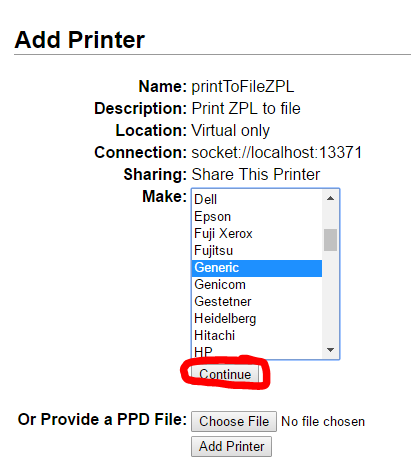
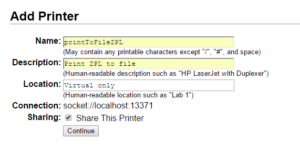 Pick any name and description. Remember the name though (we’ll need it for SAP). Make sure to share!
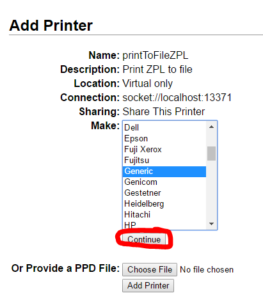 Select “Generic”.
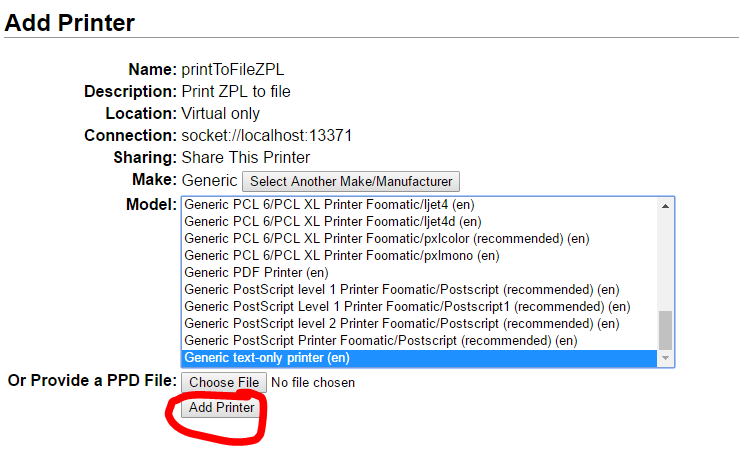
 Add the printer

To Zebra drivers or not to Zebra drivers
As mentioned before, there are specific Zebra drivers available for CUPS. However, using them in this case is actually counterproductive (except if you want to try to print a test page in CUPS itself). Here’s why:
The CUPS zebra drivers are mainly great for taking whatever input you send to CUPS, creating a picture out of it and writing that picture in ZPL. Imagine the following path:
Some program prints -> CUPS takes picture and sends picture as ZPL -> Zebra Printer
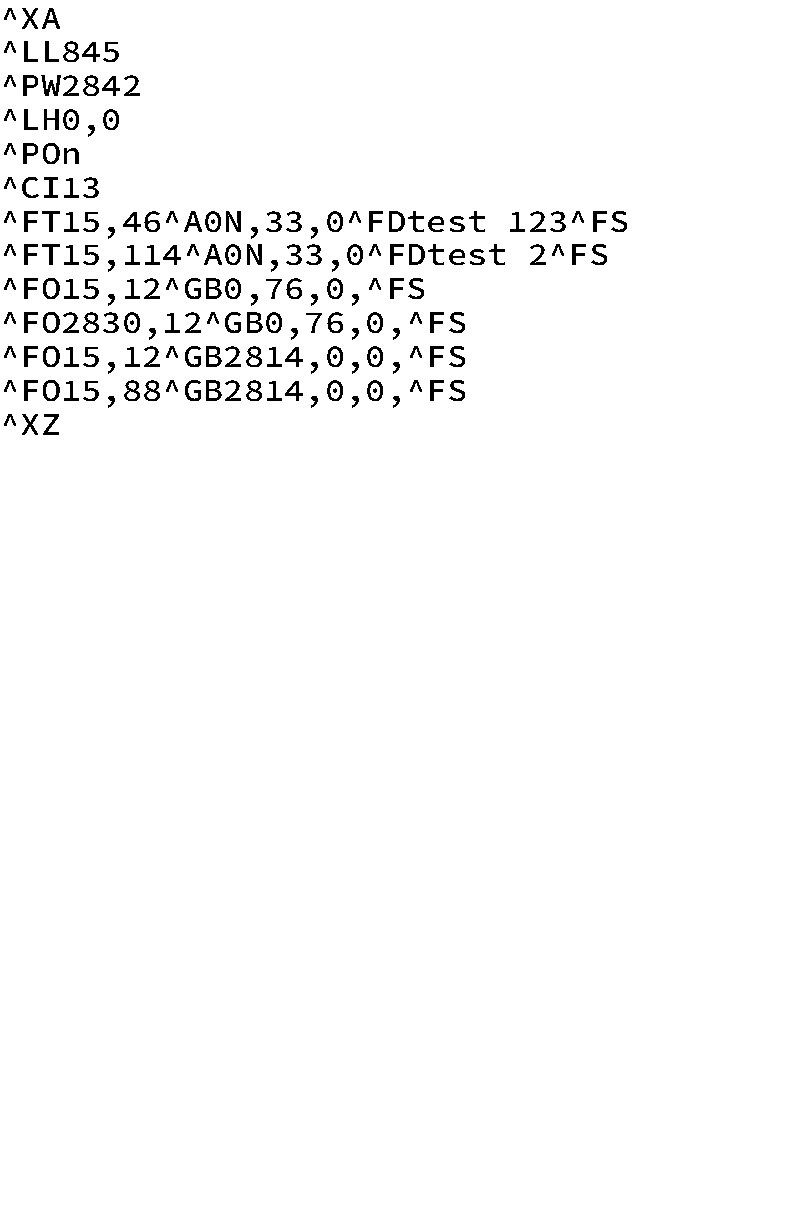
However, SAP with Zebra drivers is smarter than this! It can actually create ZPL from the start. So if you use Zebra drivers in CUPS, you will get a picture of the ZPL instructions, not the desired interpreted output (see picture to the left)!
If it’s not available, make sure the ppd files are copied into some subfulder under /usr/share/cups/model (e.g. /usr/share/cups/model/manufacturer-PPDs/zebra) !
Xinetd Magic
Now that cups sends the ZPL to localhost:13371, we need to actually listen to this. Also, we want to listen to the LPD port to enable the SAP system to send the print spool directly to our linux box.
CUPS-LPD (so SAP is happy)
Enable cups-lpd /etc/xinetd.d/cups-lpd set “disabled = no”. The whole file should look something like this
service printer
{
   disable = no
   flags = NAMEINARGS
   socket_type = stream
   protocol = tcp
   wait = no
   user = lp
   server = /usr/lib/cups/daemon/cups-lpd
   server_args = cups-lpd -o document-format=application/octet-stream -o job-sheets=none,none
}
Beware to add the job-sheets=none,none option, otherwise CUPS-LPD will try to print a cover page each time you print. And for the generic text driver, that will result in aborted jobs!
Writing ZPL
Create a new file in /etc/xinetd.d/ (best to copy cups-lpd, call it zebraPrint and adjust). The file should look like this
service zebraPrint
{
   disable = no
   flags = REUSE
   port = 13371
   socket_type = stream
   protocol = tcp
   wait = no
   user = wwwrun
   server = /usr/local/bin/writeZebra
   server_args = /srv/www/htdocs/printouts 8dpmm 4x6
   only_from = localhost
}
A couple of explanations:
- The port is the port you used in the CUPS printer socket setting before (adjust if you picked your own)
- The user is my apache user (I’ll share the print outputs in a folder exposed in my webserver). Pick your own user if you want to do something else 🙂
- The server is a python script that will be presented in the next section
- The server args are
- The path in which the output should be written
- The dots per mm for the output
- The size in inches (align with printer default settings in SAP!!!)
Finally you need to add an entry like
zebraFile 13371/tcp
to /etc/services and do a restart of xinetd (systemctrl restart xinetd.service)
Python Playground
The next piece on the Linux box is the python script that will actually put the outputs in the right folder. As configured in the previous section, the python script needs to be /usr/local/bin/writeZebra (or wherever you put it) and obviously needs a +x execution bit…
The script assumes that “requests” is installed (http://docs.python-requests.org/en/master/user/install/#install) and writes the printout with a time stamp into the specified folder.
The script is not rocket science, so adjusting the script to your own purposes should be fairly simple!
Essentially, the script chucks the full input stream into a txt file in the folder we gave as an argument in the xinetd service. Afterwards, a web service by the good folks of Labelary is called to translate the ZPL into a picture. The web service has more options (e.g. download as PDF…) but I didn’t need it as of yet. RTFM for your own tweaks 😉 Also, there are limitations to what can be displayed (http://labelary.com/docs.html).
#!/usr/bin/python3.4
import sys
import datetime
import requests

filename = sys.argv[1] + "/" + datetime.datetime.now().strftime("%Y-%m-%d-%H-%M-%S")
f = open(filename + ".txt", 'wb')
printout = ''
while True:
   data = sys.stdin.buffer.read(1)
   if not data: break
   f.write(data)
f.close()

f = open(filename + ".txt", 'rb')
url = "http://api.labelary.com/v1/printers/" + sys.argv[2] + "/labels/" + sys.argv[3] + "/0/"
files = {'file': f}

r = requests.post(url, files=files)

f2 = open(filename + ".png", 'wb')
f2.write(r.content)

f.close()
f2.close()
Apache stuff
Now this part isn’t quite necessary, but if you have apache installed and are writing the outputs into the right folder, a configuration in /etc/apache2/conf.d/zebraPrint.conf could look like this
<Directory "/srv/www/htdocs/printouts">
 Options Indexes FollowSymLinks MultiViews
 IndexOptions FancyIndexing FoldersFirst
 AllowOverride None
 Require all granted
 DirectoryIndex disabled
</Directory>
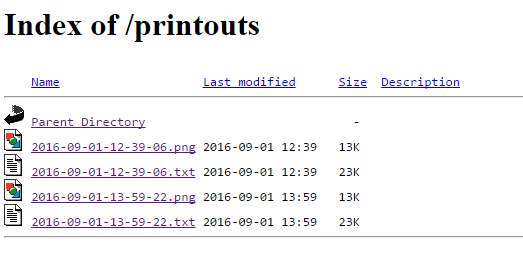
In my case this allows me to see all printouts via http://linuxbox/printouts
Give it a whirl
ONLY IF YOU ARE USING THE CUPS ZEBRA DRIVERS you can actually test at this point!
If you do (or feel like setting up a dedicated printer for it), in the CUPS interface (https://linuxbox:631/admin) you can trigger a test print for your newly created printer. You should see your first output appear. If not, try to fix it! 🙂
If you don’t want to download the CUPS zebra drivers, you can test the python script with
/usr/local/bin/writeZebra . 8dpmm 4x6 < fileToSomeSampleZPL
This should output the same ZPL and a picture in the current directory. A sample ZPL can be found here
The SAP side of the equation
Download the Zebra SAP drivers here. The readme.txt is pretty comprehensive, but for those that are a bit lazy:
- Upload the two transports into the data / cofile directories on your SAP system and import the transport (PVDK000362) via STMS.
- Use Report RSTXSCRP to upload the Device Types (*.PRI files) like so
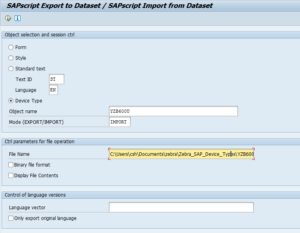
- Do the upload for all the drivers you need (probably best for all of them)
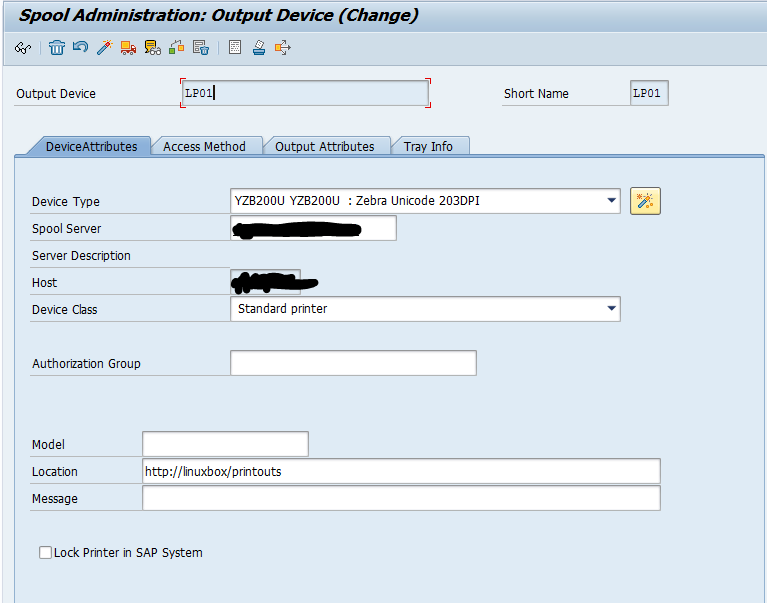
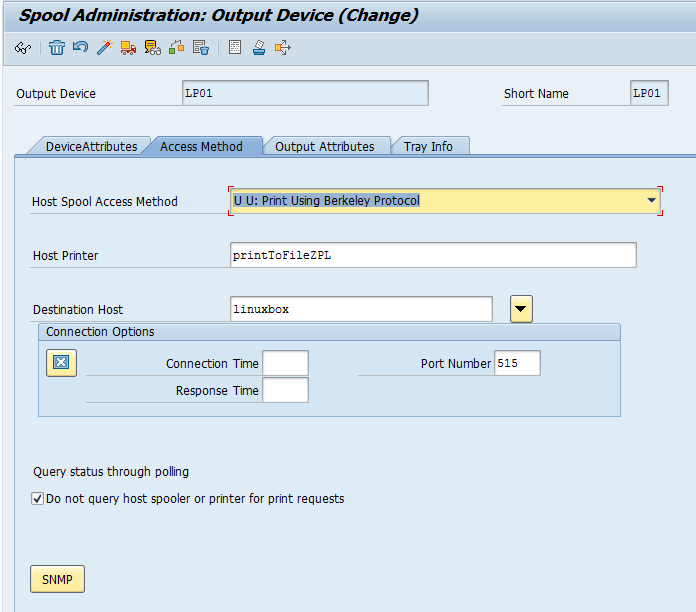
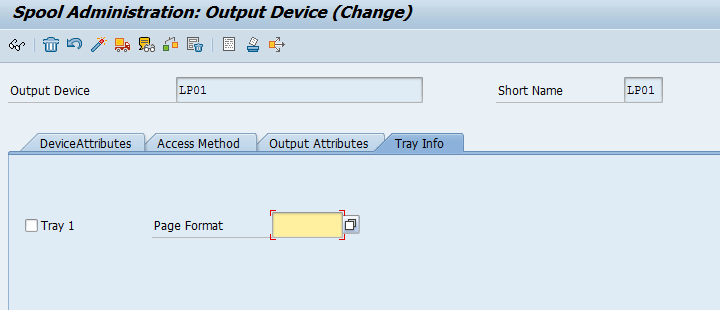
- Configure your printer in SPAD like so


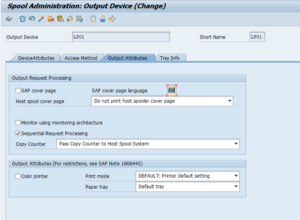
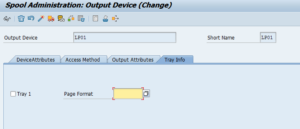
- As you can see, I put the URL in the location to remind myself where the printouts will appear. Also, beware to reuse the exact same host printer name as configured in CUPS earlier (capitalization matters in real OSes!). There are probably more cool options, feel free to comment 🙂


Unicode
I tried to use the whole thing with the unicode drivers, but the UTF16 completely messed it up for me (the webservice and my python script couldn’t cope). So I reverted back to the standard non-unicode drivers.
Give it a whirl
It’s fun 🙂